Showing posts with label Moana. Show all posts

Sunday, August 2, 2026

The Pull of Nature: Letting Go, Healing, and Reclaiming Dopamine

We all know in the movie "Moana," Maui is said to use his hook to pull the islands up from the sea. I recently watched a documentary about the ancient voyagers who navigated across the Pacific to Hawaii and other islands (the documentary was aptly named, "Voyagers." It was very much in tune with the movie—which gives major credit to the filmmakers for doing their homework, though the documentary definitely leaned into those parallels to capture that same magic.

What I really loved, though, was how it explained the actual origin of that Maui myth. When a voyager is out on open water for days or weeks at a time, looking at a flat, endless horizon, the tip of a new landmass eventually breaks the line of the water. To the navigator, it literally looks like the island is rising up out of the ocean. And when they aligned their ships with the constellation of stars that forms Maui's hook in the sky, the islands seemed to emerge directly beneath it. Thus, Maui's hook pulled the islands up from the sea.

Shortly after, I was walking through the Botanic Gardens, listening to an audiobook about forest bathing. The author was building on the Japanese tradition of shinrin-yoku, and kept emphasizing that we cannot set out with an objective or have expectations about the experience. I'm obsessed with productivity - its literally my job - but I didn't fall into this career. It's how I am in my personal life, too; always optimizing, multitasking when I can, maximizing my productivity. This book was challenging that mindset directly; it says that forest bathing need not achieve anything, and yet, can never be considered a waste of time. This notion was simultaneously repulsive and wisely valid and true. 

He started talking about not trying to force an experience or set expectations for the forest bathing time. Instead, he instructed us to be present and let the forest pull emotions and experiences out of us. Rather than, in trying to meditate, aggressively push intrusive thoughts out of our heads, surrender them to the forest and let nature pull our minds into it. 

That analogy hit home. For high achievers who hate wasting time, sitting down to meditate can feel like a test we’re actively failing. When we can’t clear our minds, we feel like we missed the point. But the idea of just walking through the trees and letting the forest do the heavy lifting feels almost empowering. You don’t have to do it perfectly. You can just let the forest handle the work while you relax into the environment.

A lot of mindfulness guidance talks about forgiving yourself and acknowledging intrusive thoughts without overthinking them; just letting things be, acknowledging the thought, and setting it aside. One practice I’ve actually started using recently is, when I find myself ruminating or playing out potential conflicts in my head, scheduling a specific time later in the day to think about the issue and worries. Once my brain knows that I have time set aside to think through these things, it becomes so much easier to let go in the moment and focus on whatever I'm meant to be doing.

Some of the forest bathing teaching suggests we can actually give our worries to nature and let them deal with them. If you tell a tree your secret, it will carry the burden for you with the force of all the trees in the forest, connected by their roots buried deep in the earth. If you tell a stream or river what's troubling you, it will turn it over and toss it about, and return it to you, perhaps more smoothed out. If you ask a rock, a worry stone, to hold your concern, it will keep it grounded until you decide you want to pick it up again, if you do. 

In this way, I think Maui's hook is all around us - it's nature in every sense of the word. It's the sky, it's water, it's dirt, it's plants. Maui's hook is a healer, pulling what ails us out and raising our spirits, if we let it. 

There’s also something to nature that goes beyond meditation and peace and quiet. Being outdoors brings an element of total surprise that you just can't get in a familiar, enclosed space. Because the forest is alive, if you open your awareness to it, you can see little moments of life that may be ordinary to the animal but extraordinary to you. 

I love spotting the bright red of a cardinal, or the deep red dragonflies I see all the time at the Botanic Garden. Even zooming my attention in to observe a bee pollinating flowers, or other insects going about their business, can feel like a little piece of the world is performing just for me. Once, I saw a hawk catch its prey right in front of me; today, I spotted what I think were turkey vultures working away at something they'd found. You can’t force those moments, and you can't plan for them every time you go out. That unexpectedness acts as a happy trigger - it pulls your focus away from whatever internal loop you were stuck in and locks it onto something unusual, wild, and fascinating.

It made me think about all the books out there about the addictive nature of social media and how it acts like a gambler’s slot machine. You pull the handle to see if you got a comment or a like, chasing those unpredictable dopamine hits. But that constant feedback loop distracts us and pulls us away from our own thoughts, purpose, and meaning.

It feels really important to get outside and replicate those positive dopamine hits through natural surprises instead—grounding them in the real world rather than in technology, social media. In my case, I've been letting go of a volatile relationship where the good was great, but the frequent bad just wore me down like a bad betting habit. Stepping away from that cycle is tough, but getting those hits from a healthier, natural source where I don't have to force anything or win anyone over feels like the right way forward.

Sunday, November 20, 2022

DIY Christmas: Stockings Sew Easy!


I am a little obsessed with my homemade stockings inspired by the movie, Elf. This was my first time making my own stockings and I was surprised how easy they were! 

Briefly, the steps I took:
  1. Fold the fabric in half and cut the shapes using a general pattern or reference, such that there are two pieces which are mirror images of each other. 
  2. Sew across the white fur on both "outside" faces of the fabrics. 
  3. Place the outsides facing each other and pin in place. 
  4. Sew around the sides and flip inside out when done - just like making a pillow! That way, my imperfect sewing is concealed inside, and all you see on the outside are nice seams. 
  5. Hot glue decorations - ribbons, belt, bows, etc. Highly recommend this instead of trying to sew decorations on. It seemed to work really well!

Since I had so much fun making these (and honestly, am really proud at how they turned out), I started brainstorming other designs I could make. Take a look at some of my other ideas!  


If you prefer the original Jovie color scheme: 

More "Elf" ideas (if you have more humans raised by humans):

...and some more because I just couldn't stop...


Okay, enough of "Elf", what else we got? How about stockings for Lego fans?  Get the fabrics here.


I've always adored the patterns from Moana! They could be turned into unique stockings for fans! Check them out in my Dress Up Time collection here.


Speaking of Disney, I plan on making a pullstring backpack with my Guardians of the Galaxy: Mission Breakout -inspired fabric, but it could also make a funky stocking!Or use some Tivan-style writing from the Obscure Writing collection.


While there are plenty leopard print designs out there, have you ever seen a giraffe print stocking? Me neither! That's one reason I started my "You Animal" collection - to bring more representation and variation to the animal print options!


The Pantone Color of the Year for 2023 hasn't been announced yet, but it is anticipated to be "Digital Lavender". You can be very fashion forward with these Digital Lavender patterns hanging from your fireplace this year!


Sunday, February 17, 2019

DIY Moana Sail Purse/Bag

A couple years ago, Jaiman and I decided we should try to move to Florida to be close to Disney World so we could go regularly. I was extremely lucky to land a wonderful full time job in Florida which I started in July 2018, and now that we're here, we've started going to Disney World roughly once a month.

While we both have some fantastic Disney shirts, he suggested a month or two ago that we start Disneybounding. If you're not familiar with the concept, it's basically a "lighter" version of cosplay, where you essentially just wear the colors and not necessarily the exact costume of your favorite Disney character. This actually opens up a lot of really interesting and creative directions, and you can find a ton of ideas if you search online.

Needtheless to say, we started looking for what characters we'd want to do, and I targeted Moana, because, well, she's awesome. I had pretty much what I needed already in terms of clothes, a burnt-redish shirt, khaki capris, and even
a bright turquoise gem necklace. But my bag selection was lacking. And the colors themselves didn't necessarily scream Moana like I hoped they would.

So, I was inspired to create something that would be a little more literal Moana, and came up with the idea of making a sail-shaped purse. I spent a lot of time getting the fabric design just right, but luckily for you, this work is now done and you can simply purchase it! This was my first pass at making a purse or bag of this type, and I'm pretty happy with the results.

Below are the details of my project for anyone else who may want to make something similar. I will also add, this fabric would make for great sail-shaped pillows too!

Materials needed:

Tribal Sail fabric (I used 2 yards of Modern Jersey fabric, order it here: https://www.spoonflower.com/designs/8441542-tribal-sail-001-by-lowa84)
Pins
Thread (any neutral color is fine, I used white)
Cotton cord (I used https://www.amazon.com/gp/product/B0728K3QJ4/)
Sewing machine (I used https://www.amazon.com/gp/product/B003VWXZKG/)
Fabric scissors
Black marker

(Optional) Chiweiner or other lovable pet to cheer you on (Carly is always trying to get in my pictures!)


Time: 2 - 2.5 hours


Skill level: Basic


Instructions:

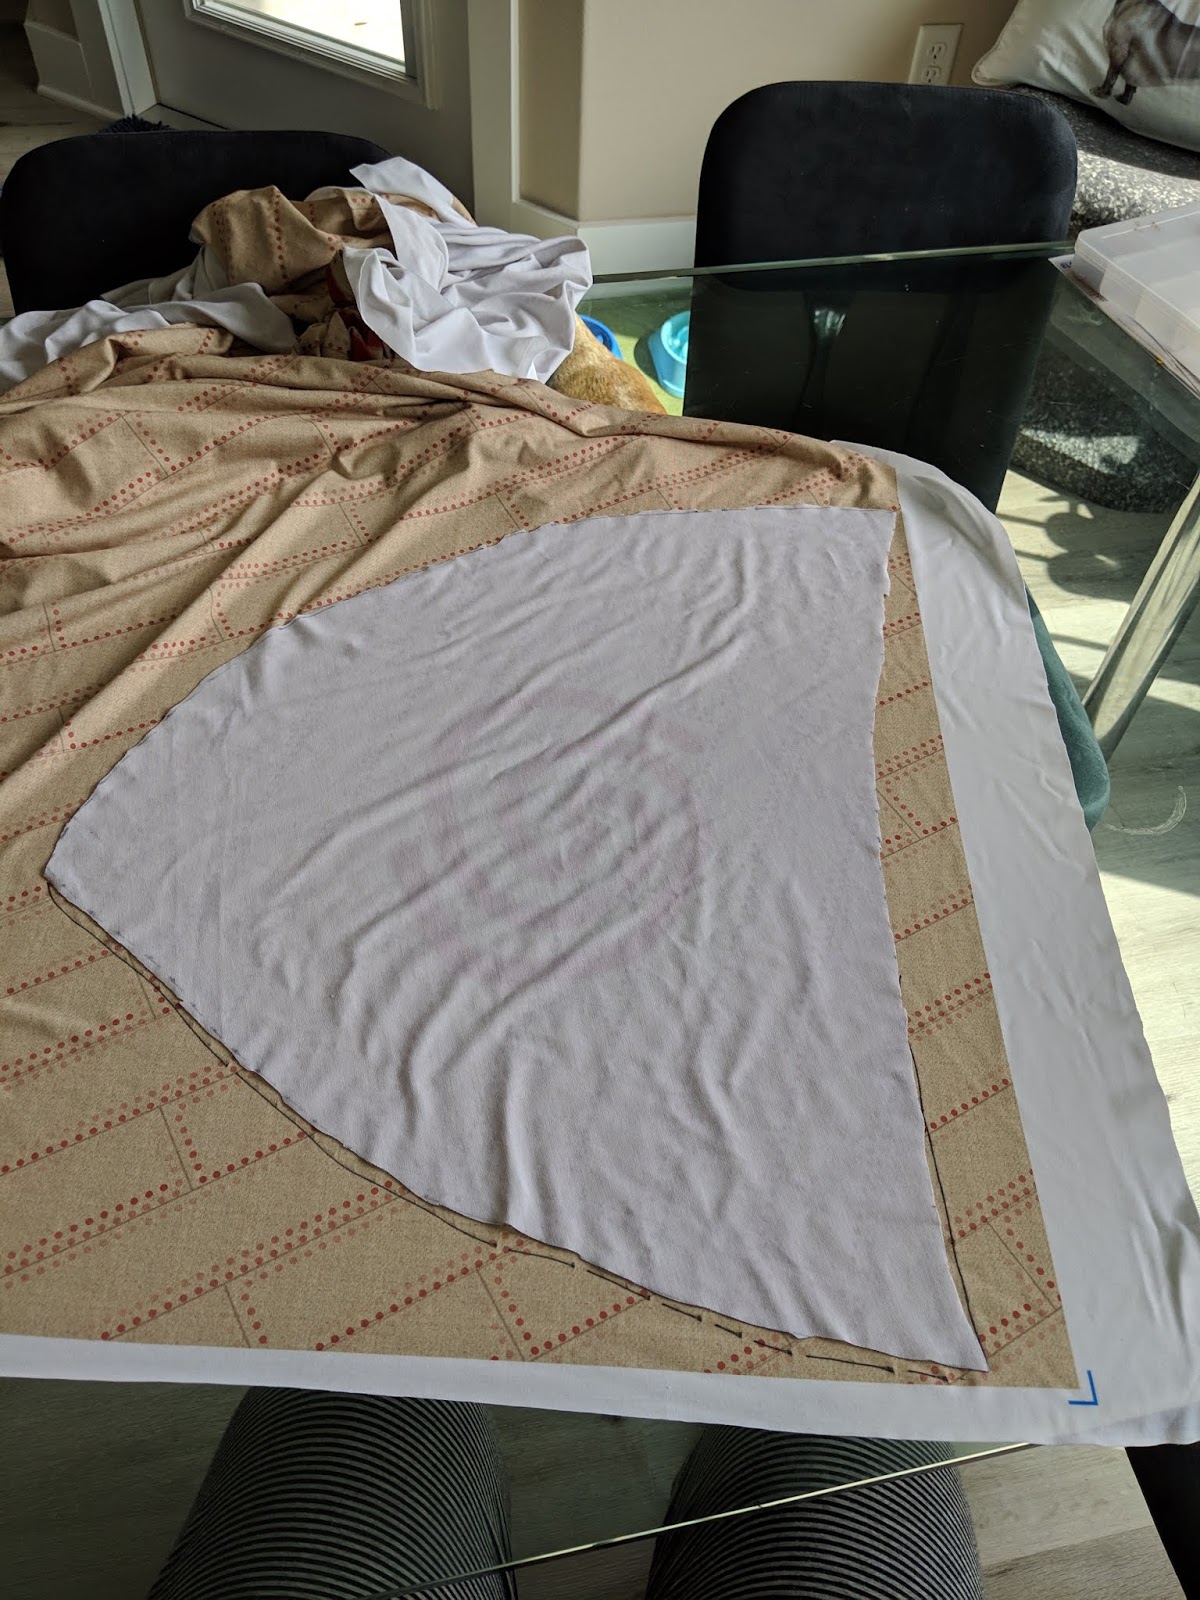
1 - Lay the fabric out on a flat surface with the spiral pattern centered. Imagine and then draw a large sail shape with the marker. Make it about half an inch in each direction larger than you need it, since you will be sewing seams on each side. 

2 - Use fabric scissors to cut along the sail shape you've drawn. The cuts don't have to be perfect, because you'll end up hiding the cut edges on the inside of the purse.

3 - Find another section of fabric with the spiral pattern and flatten it out with the spiral pattern centered again. Take your first cutout and lay it upside down so that the two faces of the pattern are together. This is to make a symmetrical copy. Trace around the edge of the upside down piece. 


4 - Use fabric scissors to cut along the sail shape you've traced.

5 - Lay the pieces together so that the faces are towards each other and you are seeing the white underside. Line up the edges and pin them. 


6 - Take the cotton cord, measure and cut one piece double the length of the top of the shape with a little extra slack. 


7 - Tie the two ends of the cord together and place along the knotted end on top of the fabric.

8 - For each side of the purse, wrap the top edge of the fabric around the cord and pin. 


9 - Sew the seams at the top of each piece holding the cord in place.


10 - Sew the other two edges of the fabrics together, just like you would if sewing a pillow. You sew them with their patterns facing each other so that when you're done, you'll flip them inside out and the seam (and messy cut edges) are on the inside, and the outside looks clean. Helpful tip: When you get to the end of the first edge and you want to turn the corner, make sure the needle is in the fabric (manually roll it if needed) and then lift the foot, adjust the fabric and then set the foot back down. This gives you a continuous thread and ensures you don't have any gaps. 


11 - Once both edges are sewn together and all pins are removed, flip the fabric inside out through the open edge. 


12 - To make the purse strap, cut a long straight strip of fabric, however long and thick as you'd like. Make sure to make it a little more than twice as thick as you want the final strap to be. The cut doesn't have to be perfect, since you'll end up hiding the cut edges on the inside again.


13 - Fold the strip of fabric in half and pin. Then sew along the open edge. 


14 - Flip the strip inside out. It will take some working from both ends. 


15 - Cut additional cord to run the length of the strip plus some additional slack.


16 - Run the cord through the strip to the other end so you have some cord handing out of each side. Helpful tip: You can use a permanent marker or pen with a clip on the cap to wrap some cord around it and then use the marker/pen to edge through the fabric strip. 


17 - Tie both sides of the cord in the fabric strip to the cord going around the rim of the purse. Make sure it's the length you want, and trim/adjust the cord and/or fabric strip or tie additional knots as needed to get the desired length.

18 - Once properly adjusted, sew the bottom of the strip on both sides to the rim of the purse. 


19 - Show off your handiwork! Feel free to post pictures on my facebook page at: https://www.facebook.com/deziwheel/ I'd love to see what you've done!  


Get the guide

Sign up with your email below to join my writing journey, and I'll instantly send a printable guide for this project straight to your inbox: 


Get inspired

Want to bring Disney into your home? Check out my book on Amazon Kindle! 

Design Hacks for Disney Themed Rooms