While we both have some fantastic Disney shirts, he suggested a month or two ago that we start Disneybounding. If you're not familiar with the concept, it's basically a "lighter" version of cosplay, where you essentially just wear the colors and not necessarily the exact costume of your favorite Disney character. This actually opens up a lot of really interesting and creative directions, and you can find a ton of ideas if you search online.
Needtheless to say, we started looking for what characters we'd want to do, and I targeted Moana, because, well, she's awesome. I had pretty much what I needed already in terms of clothes, a burnt-redish shirt, khaki capris, and even
 a bright turquoise gem necklace. But my bag selection was lacking. And the colors themselves didn't necessarily scream Moana like I hoped they would.
 So, I was inspired to create something that would be a little more literal Moana, and came up with the idea of making a sail-shaped purse. I spent a lot of time getting the fabric design just right, but luckily for you, this work is now done and you can simply purchase it! This was my first pass at making a purse or bag of this type, and I'm pretty happy with the results.
Below are the details of my project for anyone else who may want to make something similar. I will also add, this fabric would make for great sail-shaped pillows too!
Materials needed:
Tribal Sail fabric (I used 2 yards of Modern Jersey fabric, order it here: https://www.spoonflower.com/designs/8441542-tribal-sail-001-by-lowa84)Pins
Thread (any neutral color is fine, I used white)
Cotton cord (I used https://www.amazon.com/gp/product/B0728K3QJ4/)
Sewing machine (I used https://www.amazon.com/gp/product/B003VWXZKG/)
Fabric scissors
Black marker
(Optional) Chiweiner or other lovable pet to cheer you on (Carly is always trying to get in my pictures!)

Time: 2 - 2.5 hours
Skill level: Basic
Instructions:
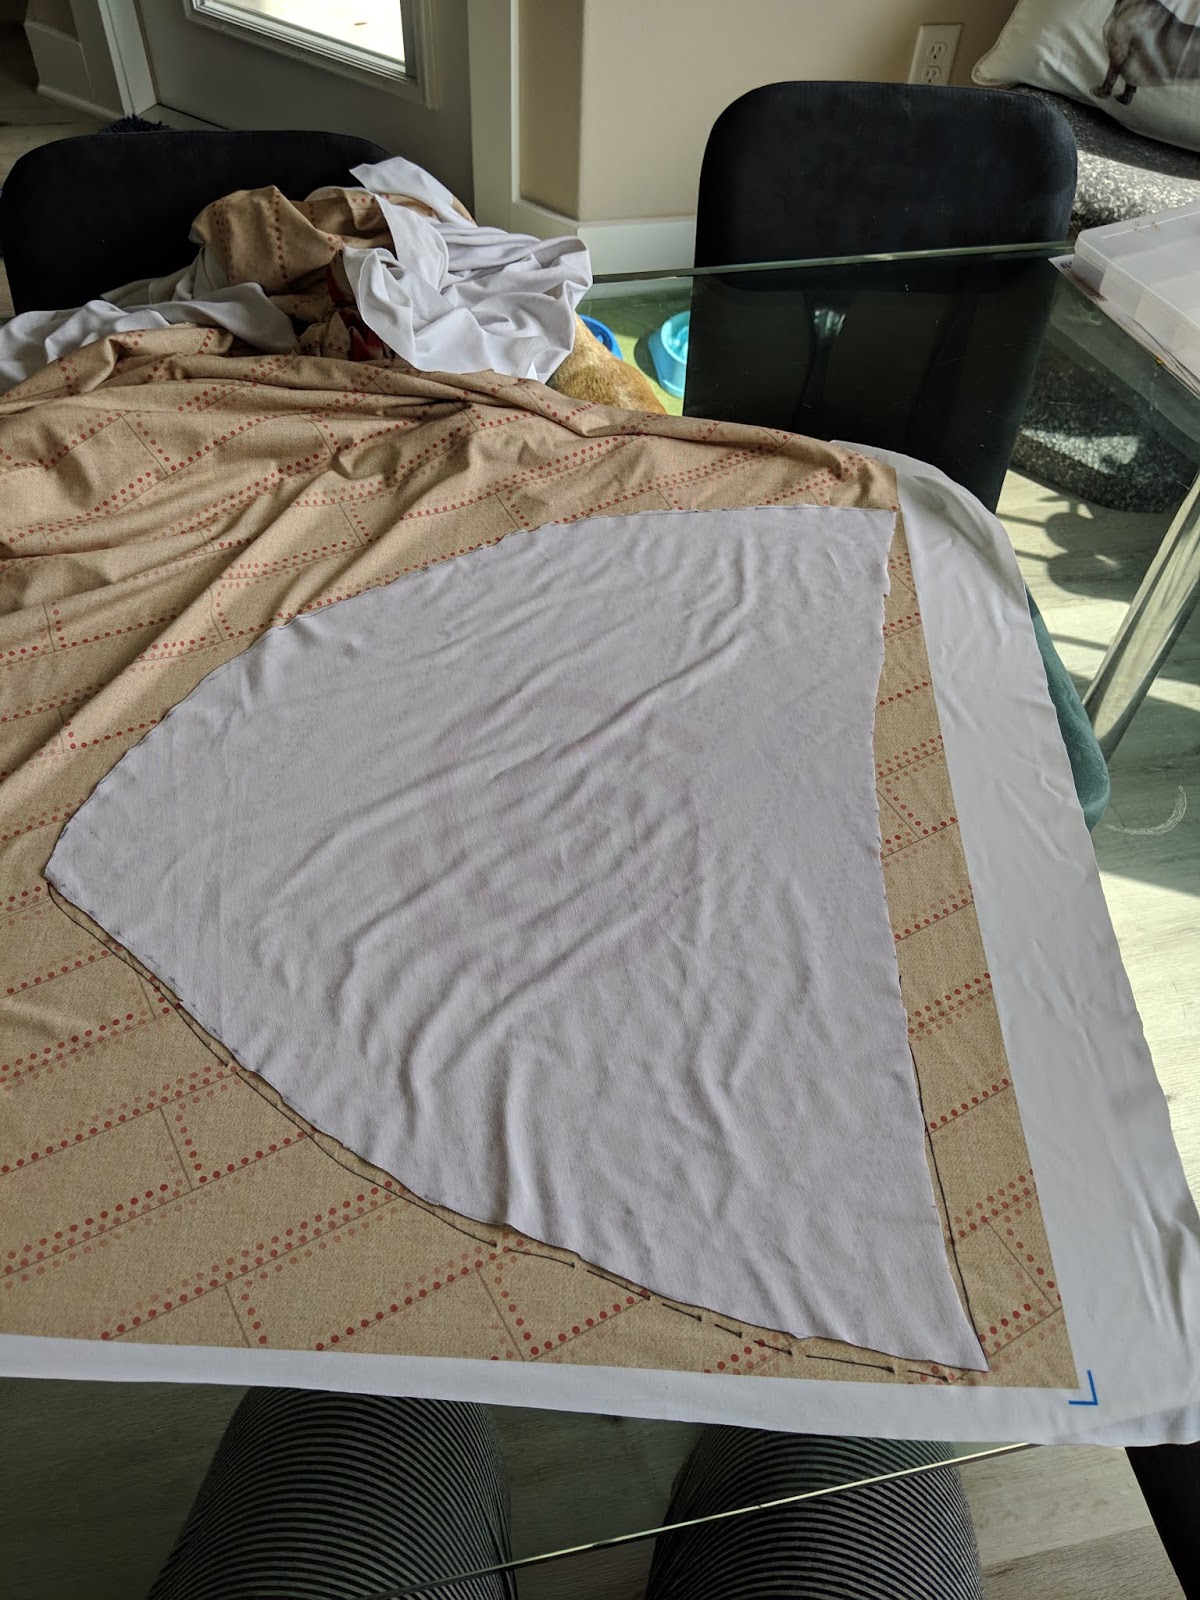
1 - Lay the fabric out on a flat surface with the spiral pattern centered. Imagine and then draw a large sail shape with the marker. Make it about half an inch in each direction larger than you need it, since you will be sewing seams on each side.2 - Use fabric scissors to cut along the sail shape you've drawn. The cuts don't have to be perfect, because you'll end up hiding the cut edges on the inside of the purse.
3 - Find another section of fabric with the spiral pattern and flatten it out with the spiral pattern centered again. Take your first cutout and lay it upside down so that the two faces of the pattern are together. This is to make a symmetrical copy. Trace around the edge of the upside down piece.
4 - Use fabric scissors to cut along the sail shape you've traced.
5 - Lay the pieces together so that the faces are towards each other and you are seeing the white underside. Line up the edges and pin them.


7 - Tie the two ends of the cord together and place along the knotted end on top of the fabric.
8 - For each side of the purse, wrap the top edge of the fabric around the cord and pin.


9 - Sew the seams at the top of each piece holding the cord in place.

10 - Sew the other two edges of the fabrics together, just like you would if sewing a pillow. You sew them with their patterns facing each other so that when you're done, you'll flip them inside out and the seam (and messy cut edges) are on the inside, and the outside looks clean. Helpful tip: When you get to the end of the first edge and you want to turn the corner, make sure the needle is in the fabric (manually roll it if needed) and then lift the foot, adjust the fabric and then set the foot back down. This gives you a continuous thread and ensures you don't have any gaps.


11 - Once both edges are sewn together and all pins are removed, flip the fabric inside out through the open edge.

12 - To make the purse strap, cut a long straight strip of fabric, however long and thick as you'd like. Make sure to make it a little more than twice as thick as you want the final strap to be. The cut doesn't have to be perfect, since you'll end up hiding the cut edges on the inside again.
13 - Fold the strip of fabric in half and pin. Then sew along the open edge.

14 - Flip the strip inside out. It will take some working from both ends.

15 - Cut additional cord to run the length of the strip plus some additional slack.
 16 - Run the cord through the strip to the other end so you have some cord handing out of each side. Helpful tip: You can use a permanent marker or pen with a clip on the cap to wrap some cord around it and then use the marker/pen to edge through the fabric strip.
 17 - Tie both sides of the cord in the fabric strip to the cord going around the rim of the purse. Make sure it's the length you want, and trim/adjust the cord and/or fabric strip or tie additional knots as needed to get the desired length.
18 - Once properly adjusted, sew the bottom of the strip on both sides to the rim of the purse.

19 - Show off your handiwork! Feel free to post pictures on my facebook page at: https://www.facebook.com/deziwheel/ I'd love to see what you've done!

Design Hacks for Disney Themed Rooms
No comments:
Post a Comment