A couple years ago, Jaiman and I decided we should try to move to Florida to be close to Disney World so we could go regularly. I was extremely lucky to land a wonderful full time job in Florida which I started in July 2018, and now that we're here, we've started going to Disney World roughly once a month.
While we both have some fantastic Disney shirts, he suggested a month or two ago that we start Disneybounding. If you're not familiar with the concept, it's basically a "lighter" version of cosplay, where you essentially just wear the colors and not necessarily the exact costume of your favorite Disney character. This actually opens up a lot of really interesting and creative directions, and you can find a ton of ideas if you search online.
Needtheless to say, we started looking for what characters we'd want to do, and I targeted Moana, because, well, she's awesome. I had pretty much what I needed already in terms of clothes, a burnt-redish shirt, khaki capris, and even  a bright turquoise gem necklace. But my bag selection was lacking. And the colors themselves didn't necessarily scream Moana like I hoped they would.
So, I was inspired to create something that would be a little more literal Moana, and came up with the idea of making a sail-shaped purse. I spent a lot of time getting the fabric design just right, but luckily for you, this work is now done and you can simply purchase it! This was my first pass at making a purse or bag of this type, and I'm pretty happy with the results.
Below are the details of my project for anyone else who may want to make something similar. I will also add, this fabric would make for great sail-shaped pillows too!
Materials needed:
Tribal Sail fabric (I used 2 yards of Modern Jersey fabric, order it here: https://www.spoonflower.com/designs/8441542-tribal-sail-001-by-lowa84)
Pins
Thread (any neutral color is fine, I used white)
Cotton cord (I used https://www.amazon.com/gp/product/B0728K3QJ4/)
Sewing machine (I used https://www.amazon.com/gp/product/B003VWXZKG/)
Fabric scissors
Black marker
(Optional) Chiweiner or other lovable pet to cheer you on (Carly is always trying to get in my pictures!)

Time: 2 - 2.5 hours
Skill level: Basic
Instructions:
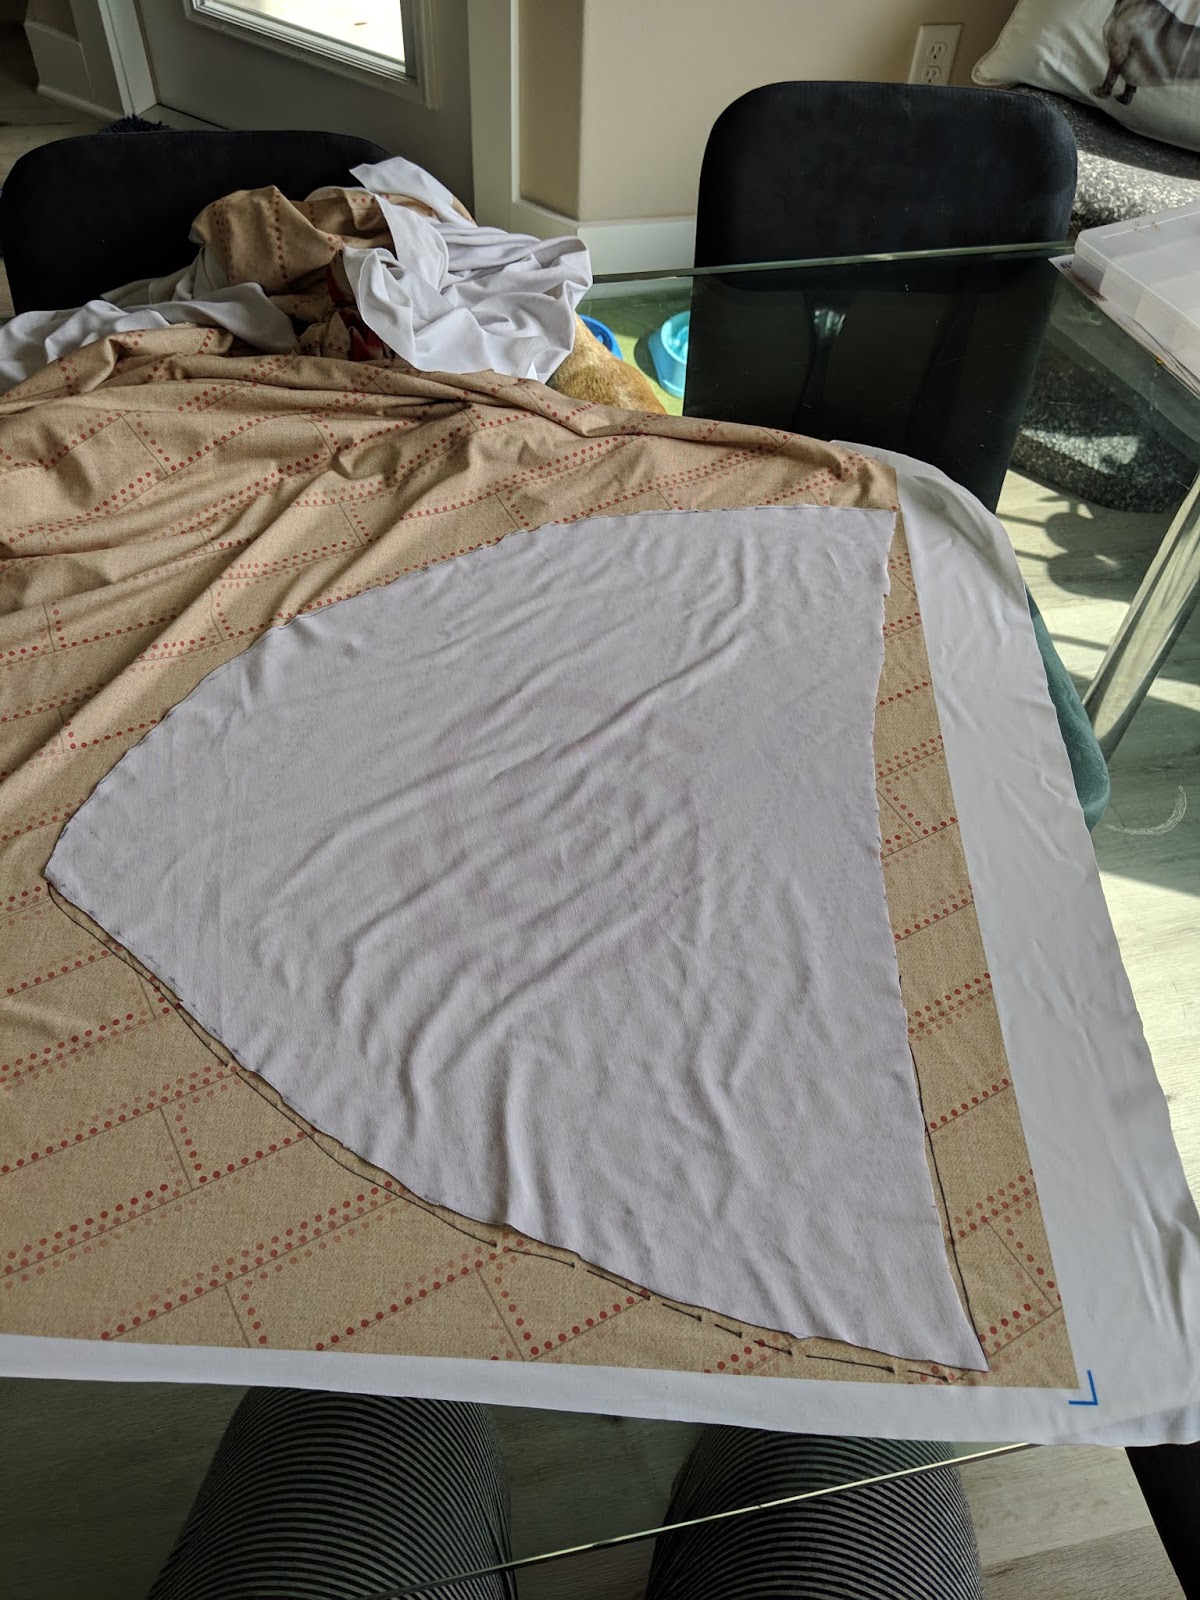
1 - Lay the fabric out on a flat surface with the spiral pattern centered. Imagine and then draw a large sail shape with the marker. Make it about half an inch in each direction larger than you need it, since you will be sewing seams on each side.
2 - Use fabric scissors to cut along the sail shape you've drawn. The cuts don't have to be perfect, because you'll end up hiding the cut edges on the inside of the purse.
3 - Find another section of fabric with the spiral pattern and flatten it out with the spiral pattern centered again. Take your first cutout and lay it upside down so that the two faces of the pattern are together. This is to make a symmetrical copy. Trace around the edge of the upside down piece.
4 - Use fabric scissors to cut along the sail shape you've traced.
5 - Lay the pieces together so that the faces are towards each other and you are seeing the white underside. Line up the edges and pin them.


6 - Take the cotton cord, measure and cut one piece double the length of the top of the shape with a little extra slack.
7 - Tie the two ends of the cord together and place along the knotted end on top of the fabric.
8 - For each side of the purse, wrap the top edge of the fabric around the cord and pin.
9 - Sew the seams at the top of each piece holding the cord in place.
10 - Sew the other two edges of the fabrics together, just like you would if sewing a pillow. You sew them with their patterns facing each other so that when you're done, you'll flip them inside out and the seam (and messy cut edges) are on the inside, and the outside looks clean. Helpful tip: When you get to the end of the first edge and you want to turn the corner, make sure the needle is in the fabric (manually roll it if needed) and then lift the foot, adjust the fabric and then set the foot back down. This gives you a continuous thread and ensures you don't have any gaps.


11 - Once both edges are sewn together and all pins are removed, flip the fabric inside out through the open edge.
12 - To make the purse strap, cut a long straight strip of fabric, however long and thick as you'd like. Make sure to make it a little more than twice as thick as you want the final strap to be. The cut doesn't have to be perfect, since you'll end up hiding the cut edges on the inside again.
13 - Fold the strip of fabric in half and pin. Then sew along the open edge.
14 - Flip the strip inside out. It will take some working from both ends.
15 - Cut additional cord to run the length of the strip plus some additional slack.
 16 - Run the cord through the strip to the other end so you have some cord handing out of each side. Helpful tip: You can use a permanent marker or pen with a clip on the cap to wrap some cord around it and then use the marker/pen to edge through the fabric strip.
17 - Tie both sides of the cord in the fabric strip to the cord going around the rim of the purse. Make sure it's the length you want, and trim/adjust the cord and/or fabric strip or tie additional knots as needed to get the desired length.
18 - Once properly adjusted, sew the bottom of the strip on both sides to the rim of the purse.
19 - Show off your handiwork! Feel free to post pictures on my facebook page at: https://www.facebook.com/deziwheel/ I'd love to see what you've done!
Want to bring Disney into your home? Check out my book on Amazon Kindle!
Design Hacks for Disney Themed Rooms
 Think of the last time you re-decorated or re-designed a room in your home. It may have been a new home, simply updating an outdated style, or for a new purpose, whether that be a nursery for a new baby, updating a kid's room to their changing tastes, creating a study for your new work-from-home lifestyle, putting in a dream man cave, game room, or craft room, or making a space more usable. You may have chosen a generic theme: seashells in the bathroom, abstract zoo animals for baby, Disney princesses for your pink-loving toddler, chefs in the kitchen, etc. You may have gone down the aisle at Target and bought everything that matched the theme, and cleverly added a few touches from Home Goods or bought something on Amazon to fill the gaps. You may have re-painted the walls, adding cohesion to the theme. And maybe you were underwhelmed by the results.
  Now think of the next time you re-decorate a room - it will be a completely different process with completely different tools and completely different results, at least if I have anything to do with it. We now live in a world where millions of talented artists are within our reach, tools to create the perfect pieces are at our fingertips, niche interests are celebrated, and hacks are abundant. And these tools, resources, and the gig economy are only going to get better, more helpful, more accessible and more powerful as time goes on.
 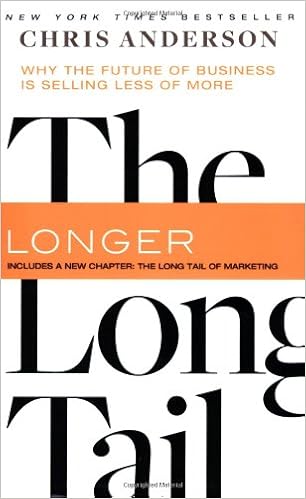 Chris Anderson's "The Long Tail" rightfully predicted that niche markets would become more accessible. In that book, he says, "It is when the tools of production are transparent, that we are inspired to create." That is one of my favorite quotes, because I truly believe that we now live in a world where we are empowered to make our dreams come true, big or small and everything in between.
To best understand where we're headed, we need to take a look at where we've come from. Big Box Retailers dominated consumer's wallets, capitalizing on economies of scale, utilizing cheap labor in China, and knocking smaller shops and artists out of the way. It seemed like there was nothing that would hinder the growth of mass produced, ever cheaper products for us to buy, buy, buy! When ebay started to get a spot in the lime light, consumers turned their interests into not just buying but also selling, the Big Box Retailers saw a small threat on the horizon, and economists wondered if auction pricing would take over the world. Amazon was a much bigger threat to the Big Box Retailers, first single-handedly killing my beloved Borders, and quickly expanding beyond books - Circuit City, anyone?
Between ebay and Amazon, it seemed that we could buy EVEN MORE! But there was another trend sneaking into the interwebs, and that was a growing crafters and artistic community. Enter etsy, the ebay of craft supplies and finished crafts and art. Social media grew up in this environment, and along came Pinterest, a beautiful blend of social media and the modern Good Housekeeping. With seemingly endless recipes, design hacks, crafty ideas and clever tricks, Pinterest went beyond the pin-board functionality and created a culture of aspirations in the kitchen and in the home. YouTube also plays its part here, with lots of tutorial videos about how to make or fix anything.
Fast-forward to today. Etsy and Amazon are still a great places to buy niche art and products, but there are even more ways to do it yourself. From Spoonflower, which prints custom fabric and wallpaper, to fiverr where you can pay someone to do something creative for cheap, and from 3D printing to maker spaces with laser cutters and decal tools, the home decorating space is ripe with opportunities to create whatever you could imagine. No longer do we need to stick with common themes: if you like a specific scene in a movie, a song, a game, or a book, you could build a whole room theme out of that. You will be able to do this, not necessarily by buying more finished goods, but by creating custom products. Craft stores have been around since before the likes of social media and etsy, but they unlike the Big Box stores, craft stores will become more relevant as YouTubers and Pinterest pinners promote more crafts and hacks that can be done with the same old craft supplies. Craft supplies are also evolving, though, too, making more accessible kits for amateurs, so you don't have to be an incredibly crafty person to create amazing things.
This will be the topic of my upcoming book! I will be focusing on creating a themed-room of Disney inspiration, and will discuss some principles to execute these amazing themes, even if you don't consider yourself terribly crafty or artistic. My main principle is to go for big, bold elements, and I will talk more about what that means within different themes and different rooms and functions.
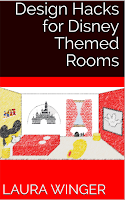
Update! The book is here! Check it out on Amazon Kindle!
Design Hacks for Disney Themed Rooms
Spoiler Alert: I am not going to tell you a secret that requires no work and makes you millions, because those kinds of things just aren't real.
It didn't take me long to learn that there are two ways to increase your wealth: cut your expenses and increase your income. Usually, becoming wealthy takes a lot of both. So while some people spend time "saving" money with coupons and scouring the earth for the best deal which may or may not be for something they actually need, or buying in bulk and having to store their goods for months on end, I focus on increasing my income so that I don't have to be a penny-pincher. And truthfully, a lot of my energy goes towards my day job, because I know if I kick butt there, I will be eligible for raises, promotions and bonuses, and I also regularly look at external jobs that I could interview for. All that being said, if you're still with me, I'm more than happy to share with you what I do as a sort of hobby that also earns me a little bit of "fun money," that also serves as a creative outlet for me.
I've found a little corner of the interwebs where I can design patterns, primarily for fabrics, but also for wallpaper, wrapping paper and decals. I create the designs in the

crude but effective PowerPoint, upload them, proof them (this costs a little bit of money) and then mark them for sale and earn commissions. When a customer orders one of my patterns, they select what fabric or format they want it on, then the website handles the order processing, printing the pattern onto the selected fabric to the specified size the customer ordered, and shipping it. And even before the product is shipped, the commission has dropped into my account, where it accumulates until I either spend it (usually on more proofs) or it gets paid out on a bi-weekly basis into my PayPal account. What's
nice is that by using the site I use, my job is "mostly" done once a
pattern is for sale. So essentially, there is some basic setup, and then money starts trickling in.
The caveat is that the infamous myth of "if you build it, they will come," is rarely true in our hyperconnected, attention-sucking world. I find there is a strong correlation between "driving traffic" through the use of social media posts and word of mouth, and my commissions. In other words, I make more money when I actively drive traffic to my designs, rather than relying on people to seek my designs out. So again, I could call it quits when I complete a design and get it up for sale. But I choose to take a more active approach to drive sales. The good news is that this also requires just a little bit of setup, and then is super simple and quick after that. So let's talk about the actual mechanics and routine of my little fabric design business.
Friday evenings I often have down time, and am exhausted from my work week. If I have noted some ideas for designs, I usually turn on the TV mostly for background noise and start idly playing with the shapes and colors of my design ideas. If I don't have any ideas queued up, I might seek out inspiration via TV, movies, YouTube, design sites and/or by reaching out. Inspiration can come from anywhere! I will often collect several ideas on a Pinterest board before getting started. The creative juices start flowing, and I often feel the sensation of getting a second wind despite being mentally tired from the workweek.
I put all my new designs in a collection, and unless I have an urgent request or feel the need to get out on the market within a week or two, I usually wait until I have at least 12 designs to proof, to reduce the cost of each proof. I usually have some recent income in my account, so the cost of proofing comes out of my income, which I don't consider in my personal budgeting anyways so it's like it's free. Once I receive my proofs, barring any issues with the way they look printed, I put them up for sale and move them into their permanent collections (just a few clicks).  Then I arrange the physical fabrics and take a few pictures, crop the pictures and create social media posts with the pictures and links to the designs. I also add the pictures to the design pages. These social media posts then become part of my rotation of posts. Most weekends, usually on Sunday, while watching TV or riding as a passenger somewhere, getting a pedicure, etc, I will use Hootsuite to schedule posts for the next week or two, to continue driving traffic. The big secret here is that I scroll through my previous posts, select the retweet option, and then remove the part in the message that makes it a retweet, so then it looks like a fresh, new tweet even if I haven't changed up the wording
  at all. I use the Autoschedule function which makes it super quick to schedule many posts in one sitting. I can do it in bed, while in the bathroom, while waiting for someone, while riding as a passenger, whenever I have internet and a few idle moments. About a week's worth of messages can be scheduled in about 20 or 30 minutes, and then I'm done for the week!
About once a month or so, usually on the weekends, I will respond to customer purchases (I usually wait at least two weeks to give the customer time to receive the fabric and start their project so I'm top of mind when they're working on it, not when they're waiting for it to arrive) and any messages from customers. Every time I get a purchase from a user, (there are guest purchases whom I can't contact) I make sure to do four things: (1) Thank the customer for their purchase, (2) Invite her to share a picture of the finished product with me so I can show off her work, (3) Provide a link to designs they may also be interested in (within my portfolio) based on what they've bought, and (4) Ask the customer to reach out to me if they have requests for similar designs with different colors, or any other ideas we can work on together. When customers send me pictures of their creations (which are way better than what I could make on my own), I get great free marketing material! Of course, I only share with permission, but using my customers' feedback and pictures is much more fruitful and easier than coming up with my own graphics and content.
That's it. That's all I do, and it's not really every weekend that I attend to my business other than scheduling social media posts from Hootsuite. It may be once a month, or maybe six weeks go by before I return to design work or responding to customers. I primarily make sure to have social media messages scheduled, and I make money daily. Again, it's not a lot of money, but it's real money I can use for charity or travel, and the little bit of effort it takes is also relaxing, fun and inspiring, so it's good for my soul!
The site I use is called Spoonflower, but before you jump immediately to that site and create your profile, keeping reading, because fabric patterns are not the only way to do this, and there is also a little bit more to think about.
Find something you enjoy doing and happen to be good at. This may be easier said than done (trust me, I have a ton of passions and have been called unfocused more than once), but it's generally free or cheap to experiment, and failure can teach us as much as success. If you can't think of anything interesting and extraordinary to do, consider (1) taking a class at your local community college, library or arts center, (2) browsing Twitter for trends/topics that interest you, and then do more research to become an expert, (3) perusing fiverr.com for examples of things people do and get inspired, and/or (4) practicing a variety of arts and skills until you find a niche that stands out to you.
Don't quit your dayjob, or endanger it. Seriously, this is not a blog about how to start a business that will make you millions. But just as important, don't start a side business that competes, or can be perceived as competing, with your dayjob. Conflict of interest is a serious issue that can lead to getting a person fired, or at least in trouble, and isn't worth it. Besides, who wants to do more of the same? Variety is the spice of life; I find my work on the side liberates different parts of my brain and personality. My dayjob is somewhat analytical, so my side business is creative, fun and relaxing. Also, it's important not to use company resources, work time or work connections for your side business, to avoid conflict of interest issues again.
List your wares. We live in a global marketplace where the most niche products can find customers and novel ideas and content can go viral with millions of viewers. The first step to getting out there is finding your corner of this marketplace. Etsy is perhaps one of the most well-known marketplaces for crafts and art forms, but there are many other platforms on which you can express yourself. CafePress is another one that comes to mind, but do a Google search for "personalized gifts" and you'll find sites where you can upload designs and sell them pretty readily. I like the Spoonflower model because there's no fee for uploading or listing them for sale. Again, Spoonflower handles the order processing, production and shipment, so for that they get the bulk of the revenue, but I get a little percentage-based commission for every purchase of my fabric.
Promote and drive traffic. Coming back to perhaps the biggest myth of entrepreneurship, the, "If you build it, they will come," mantra. If you make a great product people are looking for, and you do your SEO (keywords & tags) right, you will get some traffic and maybe some sales that way. But for the most part, your work has only begun when you've posted your design. In many ways, people need to know a product is out there before they know they want it. I try to inspire the crafty-minded people with my messaging, and also use hash tags that help non-followers find my posts. I usually post new designs to facebook only once, but I will repeat posts on Twitter.
Here I would advise you to be sensitive to your social networks - many people are turned of by soliciting on facebook, and you may find yourself unfriended if you persist. So for facebook, I tend to make it more about, "Look at this cool thing I did," and less about, "Buy my new design." Customer pictures are a great example of something I feel I can share on facebook, because I give them a shoutout instead of making it about selling my product. Save the hard sales for Twitter, where you can post regularly and many of your posts will get lost in the shuffle until the right people come across the right ones.  Hootsuite is an invaluable tool for scheduling posts across multiple social media platforms and accounts, and it's free for a limited number of accounts, but well worth the upgraded account. At a minimum, try the free version when you are working on starting your business. I won't get into keywords and SEO here, because that's a huge topic, but if you are unfamiliar with these topics, Google them to understand a little bit better about how to use the right language to get picked up in search in the best way possible.
One other point on promoting through social media: make sure it's "social" and not just free advertising. Think about trying to inspire people, including creating content such as a how-to or a catalog of inspiration. A good rule of thumb is that you should have at least 3 "soft sell" or helpful content posts for every "hard sell" post (i.e. "Buy my product").
Use pictures. This is a no-brainer in social media these days, but for the novice, it must be said. Posts with graphics get way better visibility than plain text or text with links. Make great graphics, drive more traffic. I like to use pictures my customers send me (more on this later) to help inspire new customers and show my admiration of my customers' skill.
Make what customers want. This is another point that may seem easier said than done, but I think you'll find its actually easier than you think. Anyone familiar with the lean startup methodology understands that asking customers upfront can save you time and effort down the road. The trick, I've found, is asking the right questions. If you ask questions that are too generic, you're putting the burden of the creative process on the customer, and I think you'll find, as I have, that most people are not all that creative. If, on the other hand, you ask questions that are too specific, you'll get false positives - that is, you'll get reassurances like "yeah, that's a great idea," but the income won't follow because it's not necessarily what people want. Here's an example from my business: I have found that recreating fabric patterns from popular characters has been profitable, so I will ask facebook friends, fellow nerds, and previous customers, "What is your favorite cartoon character?" Or, "What movie are you looking forward to most this year?" Not all characters have a distinctive fabric pattern associated with them, but the answers to these questions can at least give me leads to look into and get inspired.
Engage your customers. It may be obvious to some people, but it was a major revelation for me when I realized that people who have bought my fabric are the people most likely to buy my fabric in the future. My customers (a) either have some disposable income to spend on fabrics or are using the fabrics for their own business, (b) are obviously interested in fabric crafts, and (c) have access to my fabric store. From a target market perspective it doesn't get much more targeted than that! While some of my best-selling designs were original ideas, many of my top sellers originated with a request from a customer that had bought something else first. Probably my biggest success story was a request from a previous customer that, once completed and listed for sale, she shared with all her friends, and within a week, I had about 5x my normal income, and it quickly became popular among strangers too. When you do something your customer wants and loves, the reciprocity of word of mouth is powerful!
Make a routine. What I've tried to describe here so far are some general guidelines and specific examples of getting your (mostly) passive income business set up. Once you have found something you either have confidence in or are committed to experimenting with, get a routine down. As alluded to before, there may be some truly passive income of people searching for your exact product, but I consider my business less passive than that.
It's not a lot of work, but with a steady routine of just a little bit of effort, I keep a steady stream of extra "fun money" coming in. And who doesn't want a little more money every two weeks?
Want to bring Disney into your home? Check out my book on Amazon Kindle!
Design Hacks for Disney Themed Rooms
Cinch
bags are super easy-to-make accessories that are surprisingly handy. I
keep my small beauty care items, like chapstick, tweezers, and hair
bands, in my cinch bag so they don't get lost in my purse. Cinch bags
can be made for gifts with a personal touch, or for easy fundraisers
that also develop sewing skills. I
like to make my cinch bags with different but complementary fabric
patterns. You can make them with as much personality, or as simple, as
you want.

Materials needed:
Four (4) 8" x 8" pieces of fabric
1 1/2' parachute string or thin ropes
Pins, thread, scissors and general sewing supplies
1.  Start with four pieces of fabric cut to 8" x 8". Test swatches from Spoonflower are great for this purpose. You can also pick up small cuts of fabrics at your local craft or sewing supply store.
2. Decide which pieces you want to go on the outside and which you want to go on the inside. Put one inside fabric and one outside fabric back to back and line them up.
Start with four pieces of fabric cut to 8" x 8". Test swatches from Spoonflower are great for this purpose. You can also pick up small cuts of fabrics at your local craft or sewing supply store.
2. Decide which pieces you want to go on the outside and which you want to go on the inside. Put one inside fabric and one outside fabric back to back and line them up.
3. Pin the two fabrics together. 
 4. Start sewing the first edge starting about 1 1/2" down from the top. Sew the complete bottom edge, and the back up the other side up to the same point (about 1 1/2" from the top).
5. Sew two lines across the top, leaving about 1/2" in between and some room on the top. This is where the string or rope will go through later, and the fabric on top will be the ruffles.
6. Repeat steps 2 - 5 with your other pair of fabrics.
7. Now, pair up the fabrics so that the patterns you want on the outside are on the inside and vice-versa. You will sew the bag
4. Start sewing the first edge starting about 1 1/2" down from the top. Sew the complete bottom edge, and the back up the other side up to the same point (about 1 1/2" from the top).
5. Sew two lines across the top, leaving about 1/2" in between and some room on the top. This is where the string or rope will go through later, and the fabric on top will be the ruffles.
6. Repeat steps 2 - 5 with your other pair of fabrics.
7. Now, pair up the fabrics so that the patterns you want on the outside are on the inside and vice-versa. You will sew the bag  inside out and then flip it so that the seams are on the inside.
8. Sew around the two sides and the bottom, but not the top. Then turn the bag inside out.
9. Tape the end of the string to the end of a pencil, and use it to thread the string through the channels you made at the top. You'll want one string to connect on each side.
10. When both strings are through both sides of the bag, tie the loose ends together. Pull the knots in opposite directions, and check out your work!
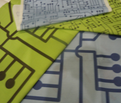
Here are some combinations of fabrics to inspire you!
inside out and then flip it so that the seams are on the inside.
8. Sew around the two sides and the bottom, but not the top. Then turn the bag inside out.
9. Tape the end of the string to the end of a pencil, and use it to thread the string through the channels you made at the top. You'll want one string to connect on each side.
10. When both strings are through both sides of the bag, tie the loose ends together. Pull the knots in opposite directions, and check out your work!
Here are some combinations of fabrics to inspire you!
Pumpkin carving
Thanksgiving and football
Technically Speaking
My circuit patterns are very popular, with lots of sizes and colors to choose from!
Jurassic Patterns
Check out my other fabric patterns for even more!
Want more neat crafts and easy hacks? Check out my book on Amazon Kindle!
Design Hacks for Disney Themed Rooms
 a bright turquoise gem necklace. But my bag selection was lacking. And the colors themselves didn't necessarily scream Moana like I hoped they would.


 16 - Run the cord through the strip to the other end so you have some cord handing out of each side. Helpful tip: You can use a permanent marker or pen with a clip on the cap to wrap some cord around it and then use the marker/pen to edge through the fabric strip.