Showing posts with label Christmas. Show all posts

Sunday, November 20, 2022

DIY Christmas: Stockings Sew Easy!


I am a little obsessed with my homemade stockings inspired by the movie, Elf. This was my first time making my own stockings and I was surprised how easy they were! 

Briefly, the steps I took:
  1. Fold the fabric in half and cut the shapes using a general pattern or reference, such that there are two pieces which are mirror images of each other. 
  2. Sew across the white fur on both "outside" faces of the fabrics. 
  3. Place the outsides facing each other and pin in place. 
  4. Sew around the sides and flip inside out when done - just like making a pillow! That way, my imperfect sewing is concealed inside, and all you see on the outside are nice seams. 
  5. Hot glue decorations - ribbons, belt, bows, etc. Highly recommend this instead of trying to sew decorations on. It seemed to work really well!

Since I had so much fun making these (and honestly, am really proud at how they turned out), I started brainstorming other designs I could make. Take a look at some of my other ideas!  


If you prefer the original Jovie color scheme: 

More "Elf" ideas (if you have more humans raised by humans):

...and some more because I just couldn't stop...


Okay, enough of "Elf", what else we got? How about stockings for Lego fans?  Get the fabrics here.


I've always adored the patterns from Moana! They could be turned into unique stockings for fans! Check them out in my Dress Up Time collection here.


Speaking of Disney, I plan on making a pullstring backpack with my Guardians of the Galaxy: Mission Breakout -inspired fabric, but it could also make a funky stocking!Or use some Tivan-style writing from the Obscure Writing collection.


While there are plenty leopard print designs out there, have you ever seen a giraffe print stocking? Me neither! That's one reason I started my "You Animal" collection - to bring more representation and variation to the animal print options!


The Pantone Color of the Year for 2023 hasn't been announced yet, but it is anticipated to be "Digital Lavender". You can be very fashion forward with these Digital Lavender patterns hanging from your fireplace this year!


Saturday, October 20, 2018

Centerpieces

Most people cannot afford to redecorate their homes for every change in season and for every special occasion.  If there is one thing in the home you can customize for a big impact, it would be the centerpiece at your table, and centerpieces can be as creative as your imagination allows!

One piece every modern entertainer should own is a plain, clear, cylindrical vase.  I would recommend one with a four to eight inch diameter, depending on the size of the table, and at least a foot tall.  These are great because you can easily fill them with seasonal icons to make stunning holiday centerpieces.  For

Halloween and Thanksgiving, you can fill them with small pumpkins, and for Christmas you can fill them with ornaments.  For a baby shower, use rubber ducks or pacifiers.  Small balloons can be used for birthday parties.  There are dozens of objects that can work, but as a rule of thumb, stick to items that approximate a ball shape so the centerpiece is interesting from all angles.  Three to twelve items of the same size, shape and theme are optimal, and should be big enough to almost fill the vase.

Using what you have around the house, a cluster of decorative items can be an inexpensive route to an expensive look.  Place several candles in a circle on a decorative plate.  A larger candle or a small vase with flowers can be placed in the center, or it can be left empty.  For special occasions, a sprinkle of confetti can really bring the look home, or rose petals (real or fake) can be scattered underneath the candles, and even along the length of the table.  Alternatively, as with fillers for the large vase, small pumpkins or Christmas ornaments can be placed on a decorative place surrounding a large candle as well.

Shabby chic centerpieces can be created with some paint and natural elements found outside.  A shallow bowl of pine cones, for one idea, are great for the fall and winter holidays.  Pine cones can be left alone, sprinkled with glitter, or painted in seasonal colors to match your holiday décor.  For winter holidays, you might even try painting them white and sprinkling them with silver glitter, for example.  Likewise, gathering twigs and spray painting them, setting them upright in a small vase can add a quirky, wild twist to the common centerpiece.  If you have fruit that has fallen from your trees, instead of tossing them in the garbage, paint them in shiny metallic colors or bright summery colors to fit the occasion.

For wedding showers, reunions and birthday parties, photographs can be utilized in centerpieces.  Consider making your own memo holder by partially straightening large paperclips and sticking the end into a piece of decorated Styrofoam.  Or, print pictures on thin paper, wrap them on an empty food jar and make a paper mache collage.

Still not sure what to do?  A trip to your local crafts store is a great source of inspiration, especially for seasonal events.  Browse through the various sizes of vases, buckets and containers, and see what you can find to fill them with, from artificial flowers and plants to crystals, beads and feathers. 


For more craft and design hacks, check out my book, Design Hacks for Disney Themed Rooms!

https://www.amazon.com/dp/B084H5SK33

Monday, December 21, 2015

Personalized Home Sweet Home Gift Hack

I wanted to share this great DIY craft that I made for my Mom this year.  Don't worry, we celebrated Christmas early, so she has already received her present, no surprises will be spoiled here.  The great thing about this gift is that it takes a little bit of work, but can be done in a pinch and requires very little creative ability. 

First, find a picture frame with a matte that you want to use.  Note the size of the picture that will fit inside this frame.  Most of the rest of the steps will be done with a computer. 

Then, we need a picture of the front of the house.  It would be preferable to have a high-quality picture from a decent camera taken when you are there.  In a pinch, however, you can use StreetView on Google Maps to get it.  There are many ways to do it, but I would recommend putting your browser into Full Screen view and using the Print Screen button on your keyboard to capture the image.  Capture more than you will need, because we'll crop the image later. 

Next, clean up the picture using PhotoShop or a similar program.  I removed the mailbox, the electric box and the shadow from the neighbor's house with PhotoShop Elements.  


Copy the cleaned-up picture into PowerPoint.  Right click on the image and choose Format Picture.  In the Picture Color section, adjust the Color Saturation and Color Tone as you see fit.  I ended up leaving the Color Tone alone but bumping up the Color Saturation to 240%.  Check out the difference!  


Under Artistic Effects (still in the Format Picture settings), select the Paint Brush setting, and adjust the Brush Size to your liking.  I used a Brush Size 6. 

Use the Insert function to create a rectangle on the same slide.  Right click on the rectangle and click Format Shape.  In the Size section, change the height and width to 8" and 10", respectively (or use the dimensions of the picture frame you got, if different).  Make the Line Color black or something else pretty visible, and change the Fill to No fill.  Use this frame to center the image to show the best parts of the house.  Once satisfied, you can crop the image to the same size as the rectangle, and then delete the rectangle. 

Zoom out in the slide view, and then grab the corner of the graphic to stretch it proportionately to a much larger size; this will improve the quality of the print later on. 

Because my family has moved quite a bit, I thought it would be fun to show the coordinates of all our recent homes.  I've changed them for this blog, but you get the idea.  If you don't want to show multiple coordinates, you can just show the current one.  What you probably need to know is how to get these coordinates.  I found this handy website that converts the address to latitude and longitude in decimals: http://www.latlong.net/convert-address-to-lat-long.html,  and then a tab on that same website converts those to degrees, minutes and seconds with directions: http://www.latlong.net/lat-long-dms.html.  

Note, sometimes it can be hard to remember all the old addresses.  In two cases in my experience, I couldn't remember the address but I remembered the street name and city, so I looked for it on Google Maps, and then used StreetView to go up and down the street until I found the house that looked like mine.  Google Maps will then give you the address of the house you are virtually looking at, and you can go from there. 

Create a text box centered over the image in your PowerPoint file, and put these coordinates in there.  Adjust the fonts to your liking, but I would recommend sticking to a simpler font for a bolder statement. 

You can use different tag lines for this gift.  If you had multiple coordinates, you can use the same tag line I did, "Wherever we live, it’s HOME SWEET HOME with you!"  Here are some other ideas for multiple coordinates:

Wherever you go, there you are!
Oh, the places we will go! 
Home is Where You Are

If you went with just one set of coordinates, consider one of these tag lines or similar:

Home Sweet Home
Home is Where the Heart Is

Make sure to center your text and adjust the spacing to fit in the image without blocking the main features of the house.  We're going for a big, bold effect, so make the font bigger than you think it should be, details will be lost in the overall picture. 

Once satisfied with the finished graphic, copy both the image and the text box(es) and paste them into Microsoft Paint, PhotoShop or similar.  Save the graphic as a jpg.  


Finally, use your favorite photo printing service, like SnapFish, or go to the Walgreens or Walmart websites or similar, and upload your picture for print.  Select the size print to fit in your frame, and have it printed.  I haven't used photo printing a lot, but I know Walgreens is usually pretty fast, so in a pinch, that's where I would look to print.  You can usually pick up your order in a few hours.  Once you have the print, just slide that puppy into the frame and put a bow on it or wrap it completely.  Bam! 


Want more great hacks and crafts? Check out my book on Amazon Kindle! 

Design Hacks for Disney Themed Rooms

Wednesday, November 18, 2015

Advent Calendar for Writers

Did you ever do an Advent Calendar when you were little?  Every day you got a little morsel of chocolate.  Now that we're adults, we can eat chocolate whenever we want, so I don't see the appeal in the traditional Advent Calendar.  But, in the spirit of improving my writing, I thought I'd put together a fun December schedule of writing activities to put the Christmas spirit to work in my writing.  I am also working on brevity, so my word count may be a bit limiting intentionally.  I will be sharing my responses on this blog, and I encourage any writers out there to use this as they see fit, and share your responses as you wish. 
 
1 - Coming out of the Thanksgiving season, write a blog post about what you're thankful for.  If you've already done that, write a blog about what you're looking forward to (in the next week or in the coming month, keep it short-term).  Word count: 300 - 700.
 
2 - Write a Christmas letter (whether you send it or not is up to you) about what you've been up to this past year.  Word count: 350 - 650.
 
3 - Compose five tweets about your favorite parts of Christmas, with links to a graphic, video or song.  What gets you into the Christmas spirit?  What do you look forward to (eating/drinking/singing/watching/doing)?  Word count limited to 140 characters in each post.  
 
4 - Write a short essay on the best Christmas gift (1) you've received, (2) you've given, and (3) you'd like to give.  Word count: 450 - 1500.
 
5 - Write a short story about the holidays in some fictional world - on Mars, set in the future, or set in your favorite fictional world, etc.  Word count: 500 - 750.
 
6 - Write a parody to a beloved Christmas song or poem.  Word count: varies
 
7 - Write a blog post about what you're looking forward to in the following year.  Word count: 300 - 700.  
 
8 - Create a To Do list of the best Christmas traditions to partake in or to start.  Word count: 150 - 450.  
 
9 - Write a review of a product you've purchased or received in the last year that you absolutely love.  Who else would want one?  What makes it unique and life-changing?  Word count: 300 - 650.  
 
10 - Write a blog post about your favorite quote from a Christmas movie.  Include a clip if you can find one!  Word count: 300 - 700. 
 
11 - Write a short narrative about the worst (and/or most comical) Christmas disaster you've experienced or heard about.  Word count: 300 - 750.  
 
12 - Interview a friend, colleague or distant family member about their Christmas traditions and write a blog post about it.  Word count: 350 - 900.  
 
13 - Write an essay about the true meaning of Christmas.  Word count: 450 - 1500.  
 
14 - Use your stories from #5 or #11 to write a Seussical short rhyming story.  Word count: 75 - 400. 
 
15 - Write a short narrative about your favorite Christmas from your childhood.  What made it feel magical?  Did you believe?  Word count: 500 - 900.  
 
16 - Write a report to Santa that an Elf on the Shelf would write if he was watching you.  Have you been naughty or nice?  Word count: 300 - 650. 
 
17 - Write an essay describing what would be a perfect Christmas holiday for you.  Who would be there?  Where would you celebrate?  What would you do?  Word count: 450 - 1100.
 
18 - Write a blog about Christmas shopping, what you love, what you hate, what you might do differently next year.  Word count: 400 - 700. 
 
19 - Use your response in #15 to write a dystopian version of the story.  Word count: 500 - 1200. 
 
20 - Compose five tweets about the ironies of Christmas.  
                              - OR -  
      Write an essay about the logistics of Santa Claus, how the elves know what to make, how Santa delivers presents to all the kids in just one night, how Rudolph's nose shines bright enough to lead the way through fog without blinding Santa, etc.  
 
21 - Write an original poem about family, winter, holidays, traditions, love or peace.  Word count: varies.  
 
22 - Write a letter to someone who is no longer walking this Earth.  What would you want to tell him/her?  How would Christmas be different if he/she was still here?  Word count: varies. 
 
23 - Write a blog post about your favorite Christmas song or story, and the emotions it makes you feel.  Word count: 450 - 900. 
 
24 - Write a warm holiday greeting for social media, that rhymes to send to your friends and family.  Take a nice picture or choose one from earlier in the year to share with it.  Word count: 25 - 100.  
 
25 - Write a heart-felt thank you for all the memories you've made and gifts you've received. Word count: 35 - 75.  
                                                       - OR - 
      Write a short narrative about the fun you had celebrating Christmas this year, and what made it so special.  Word count: 400 - 750. 

Monday, September 7, 2015

Rejuvenating Ways to Spend Labor Day Weekend

If you're not barbecuing or traveling this weekend, make the most of it so you don't look back on the three day weekend with regret.  Here are some ideas to return to your four day workweek rejuvenated. 


  • Review upcoming schedules for football games or theater shows you may want to go to, and buy tickets 

  • Get the family together, turn off the devices and play old fashioned board games or card games. I recommend Ticket to Ride and Rummikub!
  • Try out a new restaurant in your area
  • Go for a walk or hike
  • Evaluate your progress on any New Year Resolutions and reinvigorate your commitment for the rest of the year or set new goals
  • Reach out to a friend you haven't spoken to in a while
  • Clean out your garage or organize a room that's been needing it
  • Consider listing an extra room on Airbnb
  • Try cooking a new dish

How are you spending your no-work Monday?

Thursday, September 3, 2015

DIY: Cinch Bags

Cinch bags are super easy-to-make accessories that are surprisingly handy.  I keep my small beauty care items, like chapstick, tweezers, and hair bands, in my cinch bag so they don't get lost in my purse.  Cinch bags can be made for gifts with a personal touch, or for easy fundraisers that also develop sewing skills.  I like to make my cinch bags with different but complementary fabric patterns.  You can make them with as much personality, or as simple, as you want. 


Materials needed:

Four (4) 8" x 8" pieces of fabric
1 1/2' parachute string or thin ropes
Pins, thread, scissors and general sewing supplies


 Instructions:

1.  Start with four pieces of fabric cut to 8" x 8".  Test swatches from Spoonflower are great for this purpose.  You can also pick up small cuts of fabrics at your local craft or sewing supply store. 

2.  Decide which pieces you want to go on the outside and which you want to go on the inside.  Put one inside fabric and one outside fabric back to back and line them up. 

3.  Pin the two fabrics together.   


4.  Start sewing the first edge starting about 1 1/2" down from the top.  Sew the complete bottom edge, and the back up the other side up to the same point (about 1 1/2" from the top).  


5.  Sew two lines across the top, leaving about 1/2" in between and some room on the top.  This is where the string or rope will go through later, and the fabric on top will be the ruffles.  

6.  Repeat steps 2 - 5 with your other pair of fabrics.  

7.  Now, pair up the fabrics so that the patterns you want on the outside are on the inside and vice-versa.  You will sew the bag inside out and then flip it so that the seams are on the inside.  

8.  Sew around the two sides and the bottom, but not the top.  Then turn the bag inside out.  

9.  Tape the end of the string to the end of a pencil, and use it to thread the string through the channels you made at the top.  You'll want one string to connect on each side.  


10.  When both strings are through both sides of the bag, tie the loose ends together.  Pull the knots in opposite directions, and check out your work!  


Get the guide!

Sign up with your email below to join my writing journey, and I'll instantly send a printable guide for this project straight to your inbox:

Get inspired!

Here are some combinations of fabrics to inspire you!  


Pumpkin carving 


Thanksgiving and football


Technically Speaking
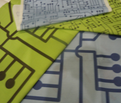
My circuit patterns are very popular, with lots of sizes and colors to choose from!


Jurassic Patterns


Check out my other fabric patterns for even more!


Want more neat crafts and easy hacks? Check out my book on Amazon Kindle! 

Design Hacks for Disney Themed Rooms