Throw pillows are one of the easiest and most obvious ways to incorporate a fun pattern, color and texture into a room, especially a living room or bedroom. Staying consistent with my decorating theory, I recommend making large throw pillows with big, bold graphics and colors. Go for size over quantity, they'll be easier to manage, less likely to fall all over the place, and have a bigger visual impact. In fact, I tend to oversize my throw pillows for this reason.
If you're buying custom fabric, like from Spoonflower, for example, there are lots of choices of the actual texture / fabric type. If you want something durable that could go outside, I'd go for a canvas fabric. If you want something super soft, go with a Jersey or Minky. I love the pillows I've made with it, and even intricate designs print really well on the fabric. For this project, I'll use a custom printed design on Minky!
Step 1: Buy the material
For two rectangular pillows, you'll want at least 1 yard of material. If you want to go bigger, you'll need to get a few to several yards. Square or rectangular pillows are "sew easy" because you barely have to design or cut anything.
Step 2: Halve the material (a number of times)
Cut the fabric in half to get the two pillows, and cut it in half again if you're going for more than two. Then, cut the fabrics in half one more time so you have the two sides of the pillows.
Step 3: Place and pin
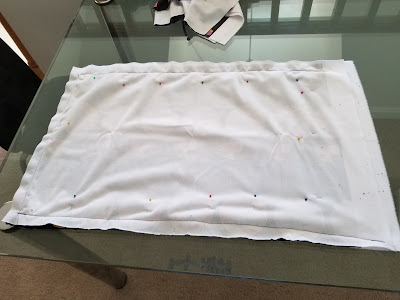
Take the two sides of the pillows and place them with the patterns facing in to each other, and align the edges. While it doesn't have to be perfect, you do want to make the edges and corners align as best as possible, because this will maximize your pillow size and minimize rework in your sewing process. Now take your pins and place them through both sheets, perpendicular to the direction of the edge.
Step 4: Sew 3 3/4 edges
I would definitely recommend using a sewing machine, as it will make this process much quicker, although it is possible to sew by hand. Place the corner of the fabrics under the needle and lower the foot to hold the fabric in place. Make sure you have enough fabric hanging over the other side of the needle so that the edges don't get loose. I was taught to sew forwards and backwards a couple times at the start and stop, to make sure the thread is secure. Sew along the edge, making sure you have both fabrics still as you go along. When you get to the next corner, lower the needle through the fabric, then raise the foot on the sewing machine. Rotate the fabric around the needle so you can continue sewing along the next edge. Lower the foot again, and continue along the edge. Leave a few inches open on the last edge (and again, I would sew in reverse and forward a couple times to secure the thread). Remove the fabric from the machine and cut the excess threads.
Step 5: Flip it
You've basically now sewn the pillow inside-out, so that the ugly part of the seams will be on the inside of the pillow. Pull the fabric through the opening to flip it inside out. If you've left only a very small hole, this may take some time to pull through. You can use a pen or the eraser end of a pencil to help push fabric through the hole.
Make sure you push the corners out as far as they'll go.
Step 6: Fill it
Stuff the pillow with polyester filling you can find at craft stores, making sure to work it through to the far corners first, and then filling it up as much as you'd like. Fuller pillows are generally preferable to flimsy pillows, so make sure you have more than enough filling. (That's Carly-Dog in the picture giving me moral support!)
Step 7: Complete the edge
When you're satisfied with your filling, sew the last part of the open end shut by hand. Then, throw it at your favorite person or pup to celebrate your throw pillow! Last part is not required, but highly recommended!
Step 8 (Optional): Add some flair
You can add buttons to the center of the pillows for a classic look, or add some frills or faux fur or some other kind of accent to two or four of the outside edges.
If you want to add some interest to your pillows, you can use a pattern on one side and a plain color or another matching pattern on the other side. The only trick with this is that you'll just have to ensure the fabric pieces are the same size, as some fabrics come in different widths than others.
Not Sew Easy Pillows
For a little bit more of a challenge but also more unique end products, try sewing a cylindrical pillow. You'll need two evenly-sized circles of fabric and then a rectangle of fabric that matches the circumference of the circles. Sew the circles onto the rectangle first, and then the horizontal seam.
Depending on what theme you're going for, you may have a desire to try a shape other than square or rectangular. For example, a Moana-themed room may have a triangular throw pillow representing the iconic sail. Or you may want to use a plain fabric to make an abstract shape of a rocket, a magic lamp, a rose, a top hat, etc., and then use an iron-on to print onto the center of the front of the pillow.
Maybe you want to add a pocket to a pillow, in which case you'd want to do that on the fabric before constructing the pillow. This might be cute for a pillow representing Woody's shirt, for example.


.jpg)